Thursday, December 9, 2010

The anchors have been lifted, and the bike is a coming.

Hello all me friends on the interwebs! It's been a while, hasn't it?

The bike project is under way. Over the past month, I focused more on getting some work done for the RPG project, which is coming along nicely. But, it was always hard to find time for the motorcycle project, which I would like to get done ASAP, so that I can finally have a full portfolio to show to employers if need be. So, I 'm putting my contributions to the project on hold in order to get the bike cranked out. I'm hoping that it'll be done sometime in January, but it's as you all know by now, very hard to tell. Especially this early in the game. Other than that there's not really too much going on.
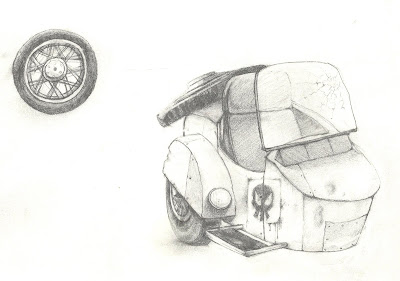
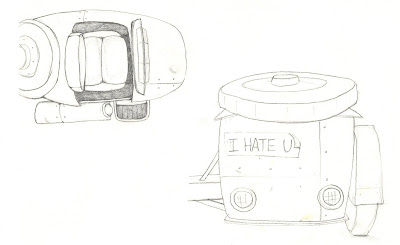
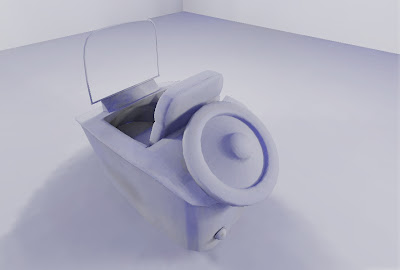
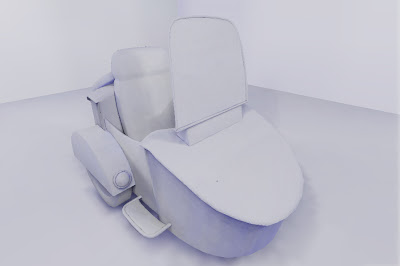
As you can see, my roommate Joe D'amico has done a bang up job on the concept. The idea in itself is simple. It's a motorcycle with a sidecar. The setting for it is post apocalyptic, so it's put together with found scraps. The idea itself is admittedly not THAT original, but we're hoping that the execution of it is something unique.

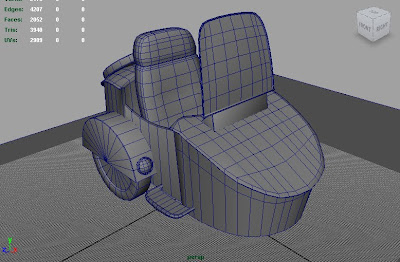
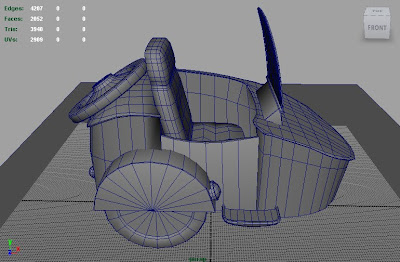
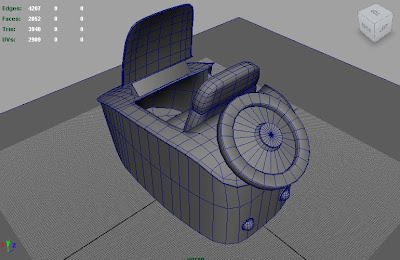
We still haven't worked out tiny details yet, but it's coming as soon as everything is modeled out. He's working on the concept for the motorcycle as we speak. It may seem like a kind of backwards way of working, but the sidecar kind of acts like a warm up for the actual bike. The bike has ALOT of detail. It's gonna be pretty hard to determine what's normal mapped and what's modeled, but that's just the fun of it. :) So for now, we're just working on the foundations of the model.

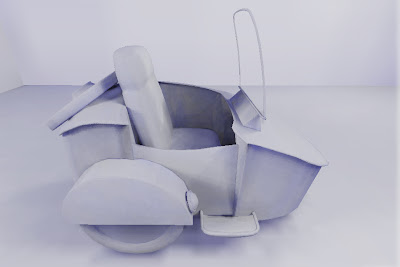
The final product will be a few shots of the bike inside an old, dusty garage. The other objects within it won't be nearly as focused as the bike, which will be an advantage as I want the bike to stand out alot. It's the centerpiece, I guess you could say. I'll also have the normal goodness of wireframe shots, texture images, and lighting only shots.

This project is meant to show off all my skills in general, but mostly that I know what I'm doing in zbrush, as well as photoshop. With that in mind, I plan on doing ALL the normal map detail in zbrush and all the texture work will be hand painted. Expect to see some renders from inside of zbrush as well as in game shots with it as a normal mapped model, naturally. The wire shots I have below are from inside the maya viewport and the lit shots are from inside the UDK editor.

Enjoy!
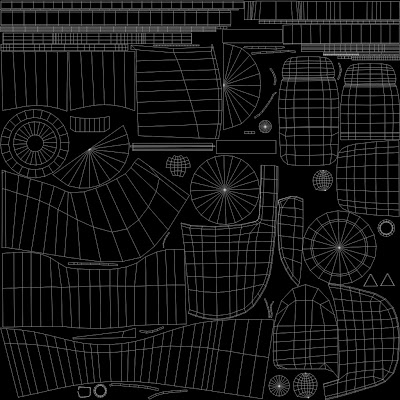
And also, here's how the UV's are set up. Nicely packed if I do say so myself.

So the next few posts will be his drawings of the motorcycle, as well as modeling progress. But before I go, I'm going to do a shameless plug for Joe's new independent video production company, Smoking Water Productions. He's got a tasty video up for my other friend Jake's techno band, The Chaotic Good. Awesome stuffs. Do yourself a service and check the links y'all.

http://www.facebook.com/#!/SmokingWater

http://www.facebook.com/#!/video/video.php?v=517684230432&oid=101298146609826&comments

Wednesday, October 20, 2010

Pripyat and Desert Straggler, versions 5.billion.

So, I just finished em'. FOR THE LAST TIME. I swear. Pinky swear, honest.

As I said in an earlier post, Due to an overwhelming consensus that I should rework all my demo reel projects, I have done just that. The laser Rifle got trashed all together as I mentioned earlier. So here's some screenies:


Pripyat

1) Remodeled the following objects to increase visual quality(mostly adding on polys since they were WAY too simple): Gurney, radiator, sink.

2) Started the lighting over completely from scratch. Lighting has more mood to it now, with stronger shadows.

3) Normal maps show up better. Not sure if it's a result of a better lighting setup, or that this version of the engine displays normal information better. I suspect a bit of both.

I can't get over how much better the lighting looks in this. I'm not even so sure that I did a lot differently from the previous lighting setup. I think I just have a better handle on all the different lightmass settings than I did 6 months ago. Learning gooooo!


Desert Straggler

1) Made the shadows cooler, to better reflect how outdoor shadows look.

2) Added a VERY low ambient light to give the overall level more brightness.

3) Made a lot of changes in color choice. Trees and sand are less saturated, rocks now match up more with mountains and cliff side, grass now matches surrounding terrain and doesn't stick out like a sore thumb.

4) Retextured the terrain and optimized terrain layer setup. Ground now has gravel and grass layers to give more surface variation.

A huge world of difference. Everything seems to work better, mainly just due to altering colors and adding more detail to the ground. Not really much else to say. The results sort of speak for themselves.

Whew, it feels good to have all of that out of the way.

Now, all I have to do is recapture the video footage of both projects and put them back into premiere to edit in. Should only take one day, which is tomorrow. I'm also trying to find a better way to post my demo reel to the web, as youtube's uncanny ability to degrade my video quality isn't quite cutting it right about now.

After that's squared away, I'll dig into the RPG project a bit more. There won't be any pics posted from that until the game demo is actually out, so don't expect to see anything from that anytime soon. I'll still be working on that side project with Joe in the meantime, which he is about 1/4 of the way done with, in sketching. Once we have a better idea of the details and the drawings are done, I'll make a nice big post about it.

Tuesday, September 28, 2010

Where do I begin?

Well, I guess I can start off with the bad news. Some professional game devs have collectively decided to crush my soul. It's a good kind of soul crushing though, because they critiqued my demo reel and in a nutshell, I'm not good enough to start applying to places yet. They REALLY hated the laser rifle, so that got trashed all together. In a couple of months, hopefully I'll be ready.

More bad news: The tf2 props have been scrapped. I loved working on them, and would love nothing more than to finish them, but it has become a low priority for me. (See below as to why)
It's what I would like to do rather than what I should be doing.

Good news: I've begun working on my first group project! Me and some other Chicago chaps are making an action rpg demo, kinda like Mass Effect as far as style goes. They're two years into it so far, so it's cool to be sort of diving into it head first, right into the fray. I've got a couple models done so far, and we meet up every other week, so good times are ahead.

More good news: In response to those critiques I mentioned before, I'm doing a new solo project that is basically making a ridiculously detailed high resolution mesh in zbrush and showing it off. I need to have a piece that shows off my high poly modeling skills, and I guess you could say that the style of TF2 weapons doesn't allow for such detail. My roommate Joe and I have come up with a concept, and he's currently sketching it out. Details to follow.

Wednesday, September 8, 2010

TF2 Props Modeling shizzle bang dizzle

As I get more and more settled into Chi-town, I also have some fruits of my modeling labours. Yes, just because I'm still getting situated doesn't mean I can't find some time to work as well. The initial low poly modeling is complete, and now I take them into zbrush and add detail, as per usual. Here they be laddies/lassies:


So, the replacement for the revolver is The Ceasefire. It's description reads as:

"Our first item is a old west style revolver that stops even the most war-hardened veterans dead in their tracks. Said to have been used by General Custer in his Last Stand at Little Big Horn, this weapon will make its victim unable to move for a short amount of time, depending on where you hit the target. Head and torso shots will give you more time, as limb shots will yield significantly LESS time. This makes it the ideal weapon of choice for making a smooth getaway. The downside is that a specific target can only be affected once until they die and respawn, and your shots will do less damage than your trusty revolver. And, oh yea, no crits allowed."

+ On hit: Freezes target for a short time, based on where the target is hit. Target is affected once in one life.

- 25% Damage to target

- No critical hits

I'm trying to stay as close to Custer's real revolver on this, but it has a lot of engraved detail on it, much like the Ambassador. I'll take the detail down a bit, and vary the design so that they don't get confused for each other. This will be by far the hardest to detail in Zbrush. It will definitely push me to my limits.


This one is the replacement for the sapper. Description:

"Enter the Instigator. This gem of an item takes the idea of your regular sapper and makes it a bit more distanced. That's right, you'll no longer have to get up close and personal with this baby, because it disables an engineer's equipment remotely. It's no matter if you're around a corner, or whether or not you're looking right at the blasted things, as long as you're within 40 feet of your targets, it'll sap any and all buildings that an engie has within that radius. However, take caution when using this device, because it takes a bit more time to fully destroy buildings. Also, it will emit an electrical current that will instantly blow your cover."

+ Remotely saps all enemy buildings within a 40 feet radius

-40% sap rate

- emits an electrical current that nullifies the user's disguise.

This guy is a mixture of a bunch of stuff I got when I googled "1940's technology". It's what you call "logical nonsense", where something looks like it makes sense and can be used for some task, but you don't know the actual tech behind it. As long as it's believable to an extent. The plane that rests over the top part is duct tape that the engineer has used to hold the bottom part of it together. Nothing works quite like duct tape. Zbrushing should be relatively easy on this one.


The Despiriter has a wonderous description:

"We've been told that this is probably NOT what King Ramses II called his favorite dagger, but it sounds really friggin cool, so why not? Backstabbing an enemy with this little number will release the tormented spirit of good ol' Ramses himself upon all who witness your crime, sending them into a helpless, frightened state that can only be cured by a hot cup of cocoa and a good crying session. The effect will wear off after about five seconds, which is more than enough time for you to finish off those who have their back turned to you and escape. WARNING: This weapon only works once during a lifetime, and every life you take after using it will take some of your life as well."

+ On hit: Puts all enemies that witness the backstab into a fear state for 5 seconds. Can only be used once in a life.

-30 health drained on wearer for every backstab after first initial stab.

It basically HAD to have it be curved. It just cries out sinister when you see it. It's a blend of a couple different references, but manages to read as Egyptian pretty well. The hilt will be engraved gold, and the round part at the top of the hilt will be the face of Ramses, carved into it.

I'm by no means a designer, so the pros and cons of these weapons may be a bit unbalanced. The description was done mainly just for fun though, the real importance to this is how they look. I'll make another post when the zbrushing is complete on all three.

Monday, August 30, 2010

New things in the mix

So, guess what? I am now a Chicago resident. YES. Where do I begin? Let's see....

1) The website is under a bit of a delay. My website maker lady had an unfortunate incident with her computer which makes it unclear as of now whether or not she lost all of her files. So I'm waiting to see how that goes. No idea on when the site will be up. I'm not worried though. It's not a matter of if, but rather a matter of when.

2) I've been playing the resume game, getting ready to apply to some companies. It seems that everyone wants something different in a resume, so that makes it tough. Just some tweaks here and there and they'll be done. Cover letters are another story entirely. Ugh.

3) I've started on another project. I've decided to visit some familiar territory this time. I'm doing some TF2 weapons! If you remember back to a year ago, I tried to work with the source engine and ended up scrapping that ctf map I worked so hard on. Compiling custom content for Valve's games is a nightmare, which is precisely why I gave up. But, long story short, I won't have to worry about that this time. You see, Polycount, the forum I frequent, held a contest with Valve recently that I really wanted to participate in, but couldn't because I was so determined to get the desert environment done. So now I'm going to do it on my own. Sort of my own little private contest. You make three new weapons for a class, and then send them in to Valve. Obviously, I can't get any sort of prize now, but I can send it in to them and have it put in the game. That's right. If you send them your own models and textures, they will compile them for you, and put them in your backpack so you can use them in-game. This kills so many birds with one stone that it's not even funny. Not even. I love TF2, it'll do a good job of replacing the laser rifle, which I am less and less happy with every time I look at it (though it's still not bad, really), and this will also show that I can do stylized prop work and not just stuff based on realism.

I've already got the concepts done, and I just started on modeling today. I'll post some pics when the models are ready, which will hopefully be soon.

Monday, August 9, 2010

2010 Demo Reel

That's right. After a year long journey with many bumps along the way, at long last my demo reel is DONE. It's hard to believe that it's been almost a year since I set out to get this done. Unbelievable. I must say that there's no way I could have done this without the support of my friends and family. In times where I got so frustrated that quitting seemed like the only option, they helped motivate me to pick myself back up, and I am extremely blessed for that. So, here it is.
All I have to do before Chicago now is put up the website, so look out for that sometime this month.

Cheers to progress!

EDIT: It appears that blogger hates my video and cuts off a part of it when I try embedding it, so here's a link: http://www.youtube.com/watch?v=mfThYDJJ3Cg

Make sure you watch it in 480P. Otherwise, it looks like crap. Hehe :P

Saturday, August 7, 2010

The Desert Sessions, PT. 9

It's done! That's right, after 6 months of solid labor, Desert Straggler is complete! I've got tons of pics to show, and I must say that this is by far the best thing I've done so far. Considering that I just started learning the Unreal engine about a year ago, I'm happy with how much I've learned since then. There's still some ways to go, but I'm anxious to see what future projects will bring. A list of things new in this final version:

1) Shack is done. No more boring-looking flat, purple and gray boxes.

2) Plane is done.

3) Tire prop is complete.

4) Ambient occlusion effect is working nicely for the outside, while the interior has very little, which looks best.

5) Water bottle shader is complete.

Enough talk. Onto the pics now:

So the biggest part of the update, the shack. It's actually made up of several props. I tried to keep the colors under wraps, with mostly reds, and greens without making it look too uniform. After all, it is made of what this guy can actually find and stick together. If you looks closely at some of the pics, you can tell that everything is held together by nails. Makes enough sense to appease the general player. I drew influence from a bunch of pictures of makeshift shacks and tents and pieced together parts from each one to form the final shack you see. As I said, my concept artist crapped out on me, so the concept is entirely my own. I didn't think I had it in me, but I'm rather proud of myself on that one. It was tricky figuring out how the shack's tarp would be held up, but reference of tents being held up by long sticks with rope sold me on how to achieve believable results. I'm also happy with how the floor blanket turned out. The dirt around the edges and over it really makes it look worn and dirty. As for the overall wall structure, it's made up of three components: wood, corrugated steel, and cloth. Not too many different things to confuse the player, but enough variety to be visually pleasing.

The plane was a lot of work. It was really tricky to get the proportions right, as I'm sure there are plenty of airplane experts out there that need to be convinced. I chose blue as a way of making it pop out of the environment, as the red-orange sand and green flora match each other. In contrast, blue stands out more. The color map is entirely hand painted, and is perhaps one of the best I've painted to date. I didn't want it to look too destroyed, as you have to believe that the guy stranded here could actually survive it, even though his friend had no such luck. Good reference was perhaps the hardest to find for the plane, especially in a wrecked state, and I drew influence from multiple pics. I like the result.

Oh yeah, and here's the maps for it:

Diffuse


Specular


Normal


The rest of the pics are things you have already seen, but enjoy nonetheless:

Fun facts about Desert Straggler, which has:

87 diffuse maps
43 normal maps
26 specular maps
(That's 156 maps in total, if you like math)

114 props
87 materials

Alright then! What's the plan now? I'm going to finish the demo reel, of course. I need to optimize the level more, so the engine keeps a decent framerate, set up camera work, capture the video, make the wireframe shots, and edit it all together. From there, I give all of that stuff to my new website maker lady, Whitney Martin, whom I'm sure will do a fantastic job. When the demo reel is done, I'll make another post. Same thing with the website. So close to having this portfolio thing done.........

Thursday, July 15, 2010

The Desert Sessions, PT. 8

Well now, it looks like there is a light at the end of this tunnel. Everything is done for the desert level, except for the shack and plane. Like I said, they're the two hardest props to make, so I'm unsure of how long it'll take to get them done. I'll be handling them as far as concept goes, so I'll be diving right into it tonight. The truth of the matter is that the shack will consist of multiple meshes that are all put together, but I'll speak of it as one for clarity sakes. All my reference is ready to go, and it's one last push until this thing is finally done.
I'm optimistic that my demo reel will be done by mid August, just in time for the move to Chicago. Speaking of that, there's an official date set: August 22nd. Words cannot express how excited I am. The actual editing of all the video, titles, music, everything is ready to go. I decided to get it all done one weekend to kind of break up the monotony of zbrushing and texturing. I literally just have to make some video of the desert and plop it right on in. I'll also be fixing some image issues in the website with Harlow, and I might also make some behind the scenes pics to show my process. But for now, here's what I gots:

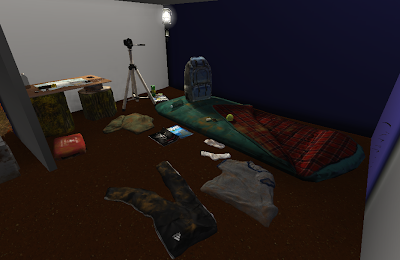
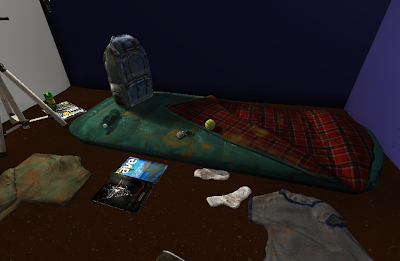
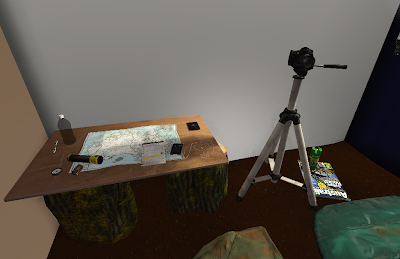
I made a bunch of improvements to the interior of the shack as you can see. I fixed some issues with parts of my normal maps fading out where light hits them. I Made a grayscale copy of their normal maps' green channel, and overlayed them over the rest of the diffuse layers. It seems like a hack, but since none of my lights are dynamic, there's really no difference to be seen except for just having more detail in general. The backpack, sleeping bag, and table logs benefited a lot from this. I also played with the specular power of some objects, which gives them a more realistic look as far as specularity goes. The plastic bottles need to be fixed material wise, but once everything around it is done, I can capture the reflection map which will make it look a lot better. I also got rid of a weird occlusion issue with certain objects, mainly the table and tripod. They were casting a weird artifact around them, but messing with some world properties straightened them out. I dirtied everything up as well, since I'm sure whoever lives there would track some dirt in there. The t shirt now has some better color choice, as does the flashlight. And most noticeable of all are the log stumps holding up the makeshift table. Pretty much everything on those are new. They were pretty bare looking until I decided some moss would look nice. Imagine them without any green. Dull, right?

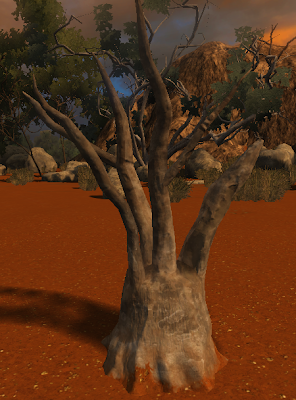
Next up is that stump thing that looked pretty bad without any texture work done to it. It has a pretty subtle texture to it, but it works. I added some sand to the bottom to make it blend in more with the ground. It looked pretty poor without it.


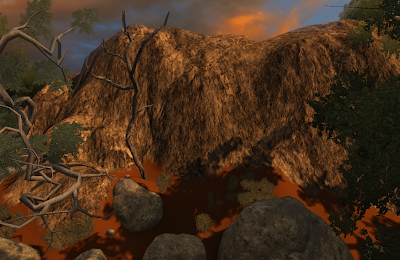
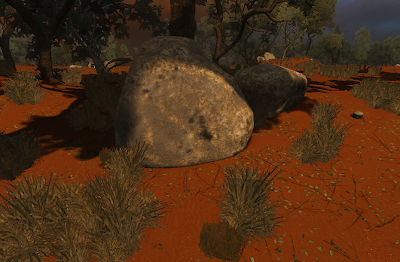
And here arethe mountains, which are improved. The old texture for it looked pretty bad, so I redid it. It uses one texture twice, one that's really big for viewing the mountain from far away, and another that tiles smaller for close up viewing. This helps break up obvious repetition of the textures, no matter what distance you're viewing it from. As you can also see, the dead tree is done. Nothing flashy here, once again subtlety works.

As one guy suggested on Polycount, I added some leaves and increased the amount of twigs. Finding a right amount of saturation for the leaves was tricky, as I didn't want them to look too fresh, but too much desaturation prevents them from blending in properly with everything else.

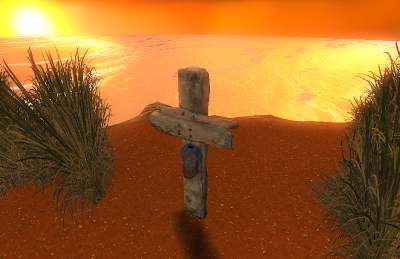
Ah yes, the grave. It was pretty simple to do. I modeled it after some reference of an old wooden sign and it has just the right amount of dirt and detail. It was tough to conceptualize how some wood carved for such a purpose would look, since he wouldn't have the best tools, but once I settled on something, it was smooth sailing.


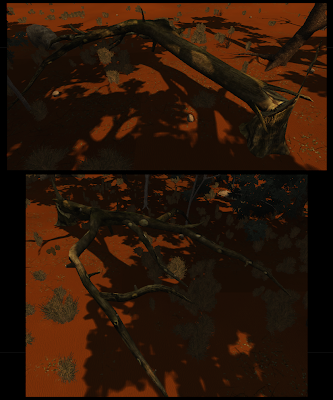
It's mostly in shadow, but the "fallen tree" as I've called it helps to break up the environment a bit. Zbrushed all to hell, this guy is pretty light at about 2000 tris. I'm pretty happy with how detailed it ended up looking.

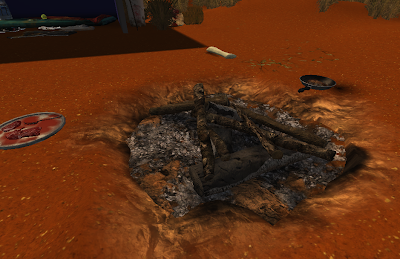
And finally, I added in that campfire area I mentioned in earlier posts. This was a bitch to do in zbrush, as I had quite a few sticks to do, and I was being a stickler on all the detail. Maybe too much for how close you get to it. Out of all the things I zbrushed, this along with the fallen tree took the most time to sculpt. I dug into the terrain a bit and put down a flat plane that would serve as the ash beneath the logs. This is definitely one of the props I'm most proud of.

That's all for this update. I've promised myself that there will only be one more final update for the desert sessions. I just really want to get this thing and looking nice. Once it is, and the website/demo reel is done, a gigantic weight will be off of my shoulders. Stay tuned...